I’ve just finished off release 1.3 of the Eclipse Paho C client which includes MQTT 5.0 and WebSockets support. Another thing I’ve done is to update the command line utilities to be much more capable, so in this post I’ll describe how they can be used to connect to the IBM Watson IoT Platform using MQTT V5.
MQTT V5 is the latest version of the successful protocol which is the core of Paho’s capability. I’ve delivered a number of talks about MQTT V5, if you’d like to learn more about it that way. I’ve also previously written about how the C client command line utilities can use MQTT V5 to connect an MQTT server which supports V5 – we have one within the Paho project.
First you need to install the Eclipse Paho C client, if you haven’t already. As described on the linked page, the easiest way on Windows is probably to install the pre-built binaries, while on Linux and the Mac, for the time being, building from source. Running the command
paho_c_pub
will check that it runs, and display the full list of options.
IBM’s IoT Platform has a quick start playground, where you don’t have to sign up to try sending events. We’re going to connect to that first of all. Go to the web page, accept IBM’s terms of use, then enter a device id in the input box. This can be any sequence of characters you like (there are some restrictions and there is a length limit) – its purpose is to distinguish your device from other peoples’. So make it something unique enough, then push ‘Go’.
To connect the Paho publisher program to the platform with MQTT version 5, run the command:
paho_c_pub -c ssl://quickstart.messaging.internetofthings.ibmcloud.com:8883 -t iot-2/evt/myevent/fmt/json -i d:quickstart:my_device_type:my_device_id -V 5
replacing my_device_id with the device id you typed into the IoT Platform input box. Now the program is waiting for you to type an input message. The message should be in JSON format, because that’s what the quick start application is expecting, so type something like this:
{"t":2}
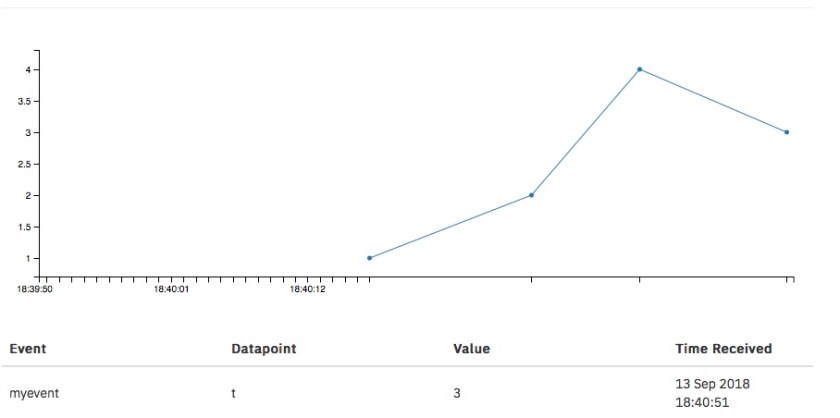
and press enter. You should see a point appear on the graph. Try sending a few more values, varying the number but keeping the rest the same, and you should see a line graph drawn something like this:

And that’s it! The -V 5 option at the end of the command line indicates that MQTT 5.0 was used rather than MQTT 3.1.1. There are two MQTT V5 specific options taken currently by the utility – user-property and message-expiry, although the platform doesn’t make use of them yet. The “–trace protocol” option will display details of the TLS exchange and MQTT packets sent and received.
If you already use the platform, to connect to an existing organization, use:
paho_c_pub -c ssl://orgid.messaging.internetofthings.ibmcloud.com:8883 -t iot-2/evt/event-id/fmt/json -i d:orgid:device-type:device-id --password auth-token --username use-token-auth -V5
substituting appropriate values:
orgid – your organization id
event-id – the event id you want send events on
device-type – your device type
device-id – your device id
auth-token – the authentication token of the device previously defined
You can then send event data in the same way.
